Christy
Hartman
All patterns and designs Copyright © belong to Christy Hartman. All rights reserved. These projects may be painted for personal
use/personal profit but may not be reproduced for graphic or scrapbook use for
resale. Photocopying and all other types
of mechanical reproduction are prohibited.
Patterns may not be republished, distributed, transmitted, displayed,
broadcast, or reproduced for any business/commercial purposes without written
permission from the artist.
Tin Tooled Owl
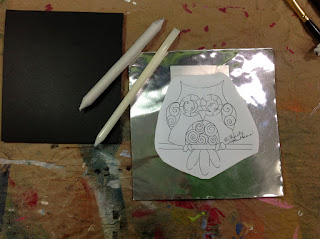
Project: Over the course of the next few posts you will see me complete a project using basic tin tooling techniques using embossing, debossing and refining. I chose to tin tool an owl but you may choose any design.
Supplies:
Tin (gauge of your choice, note the previous posts describing tin),
stylus, drawing blending staub, texture tools (optional), coloring materials of
your choice.
·
Tape
the design to the side of your tin that you want to be the back. Remember this
is a reverse embossing process and we will begin the design on what will become
the back. Using a stylus trace over the
design on the tin making sure to work on a magazine or your choice of
soft material that will allow your tin to stretch. The stylus will transfer the
design to the tin, this is not a painting technique and you will not need a
transfer material. Use enough pressure to transfer the design, similar to using
a pencil.


No comments:
Post a Comment