Tuesday, December 21, 2010

Another Great Santa

Look at this tin Santa that was painted by Connie Bartch.  This is her beautifully painted rendition of the First Star of Christmas pattern that I have been demonstrating during the past month. She was nice enough to allow me to post her painted project and I hope that you will enjoy her lovely work and leave nice comments for her.   Thanks again Connie. 

Wednesday, December 15, 2010
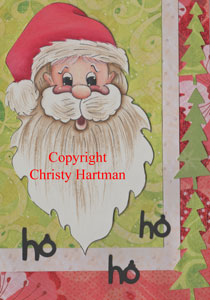
Santa Card

This cute guy was painted by Bev Atkins and she was kind enough to allow me to share him with all of you.  Isn't he fantastic!  I cheated and used my Cricut to make my letters and candy cane but Bev painted hers on and used a lovely green background.  I love it.  Thank you so much for sharing him with me and for letting me post him on the blog. 

Completed Santa


Whew!  I wouldn't have thought that this project would have taken quite this amount of time because it was an easy process.  It was an easy project but as we all know life gets in the way, but I finished this project up last night and can post the finished copy.  I used scrapbook papers for the background and used my Cricut Cartridge Christmas Cheer to cut out the lettering and trees.  I love putting projects together, it always seems like such a great way to finish up something that you've been working on and such satisfaction in the completed project.  Obviously you can completely paint the background if you prefer, use a variety to materials to decorate the cards such as sequins, brads, or found objects.  How about instead of using scrapbook papers using wrapping paper instead?  If you do something with this Santa face I would love to see the finished project, in spite of the length of time that it took me to complete it was very quick and easy.  I actually did four of these cards but am only posting the two that I liked the best.  This guy would look lovely done with either watercolor pencils, or even regular colored pencils. 

I'm not sure what the next series of blog posts will be about but check back often to see what I do in the New Year.

Sunday, December 5, 2010

Santa Face 2nd in the Series

I know that this has taken me all week to post the second in the series.  Believe me it has been a busy week.  But here is the second in the series and as I was painting Santa's face to post today it occurred to me that I hadn't posted the line art so you could paint right along with me.  Here it is!  I will post additional instructions as I paint.  Remember these painting instructions are only suggestions, you should feel free to change the colors to suit your style and mood.  Remember that you are painting on white paper so you won't need to base the areas that will remain white. 

Instructions for painting Santa's Face: 
1.  Base the face with Deco Art Americana Hi-Lite Flesh, float shade with Shading Flesh, highlight with Light Buttermilk.  Base the pupil of the eye with Lamp Black, dip dot with Snow White and float a light highlight float onto the eye.  Float the cheek with Spice Pink and deepen the float over the mustache with Antique Maroon. Base the inside of the mouth with Antique Maroon.  Dip dot the cheek with Snow White. 
2.  Base the hat with Santa Red, float shade with Napa Red, highlight with Light Buttermilk. 
3.  Using a rake brush thin Asphaltum down and wash it into the beard and hat trim areas and then float shade Asphaltum under the hat brim, around the face and under the mustache.
4.  Using a SL line the hair on Santa's forehead with Snow White. 

If you are painting along with me I'd love to see the result.