Friday, April 27, 2012


This is the second in a series of posts designed to reawaken your inner artist.  I don't know about you but I frequently seem to struggle with creativity and I either doodle or now do some free exploration with paint.  Like many of you I enjoy Zentangle and love the opportunity to free my mind and just let my "fingers do the walking".  This is the same concept but with paint and is sooooo fun!  There isn't a right or a wrong way to get this accomplished and these can be painted on anything and even combined with a variety of media.  These are just painted on computer paper and I'm not sure that I will ever do anything with them or even have to feel like I need to.  Why  not think about using these in scrapbooking, card making, or even used in a mixed media collage.  The point is to just explore paint with a variety of colors, textures, patterns, and develop a free flowing composition.   Try this and see what you can come up with. 


Saturday, April 14, 2012

Happy Spring,

I think that we might have spring this year in the Rockies.  That would be a welcome change.  Today was gorgeous. 

I know that I have sadly neglected all of you this winter and I was embarrassed every time that I signed in to my blog.  Unfortunately life got in the way and family matters had to come first.  But I am happy to report that I am back or hope to be.  LOL.  There aren't any guarantees in life. 

I've just posted a new free pattern on my website that I had a blast painting.  I know that many of you are Zentangle fans and I use Zentangle with my upper elementary and middle school students to help free their minds and allow their creativity to come through and they have really enjoyed it although I often find that what they really want to do is free paint.  They adore that, even the middle school students.  They love the freedom and the opportunity to paint without restriction or having to adapt to required elements.  I tend to agree with them and decided to do something completely out of the norm for me and put it on my website as a free project.  I love this piece and hope to do more of them because they are just so darn fun to do.  I purposely kept the instructions fairly vague so that you had the opportunity to express yourselves creatively. 

I hope that you enjoy the process, because the process is often just as important as the outcome.  I'd love to see what you come up with.

Hugs to all of you and Happy Spring.


Sunday, December 18, 2011

Merry Christmas to all of you!  

I've posted on my website homepage and here on my blog the finished card which is in the Tole Town Cyber Palette online magazine.  If you are unfamiliar with this publication be sure to check it out at www.toletown.com, Susan and Lorrie have done a great job of publishing a terrific online magazine full of painting hints and techniques as well as recipes, crafts for children, and a terrific variety of painting projects.  

This project is called Crisp and Cold Snowman and is a card but he could easily be made into an ornament or put on a variety of surfaces.  I've also posted using watercolor pencils on this little guy on my blog but in the actual magazine article are the instructions for using Copic Sketch Markers to color him as well as using acrylic paint.   

In this design I've used the Spellbinders dies for the background and I absolutely love the dies.  I have quite a collection of them now and recently acquired a set of ornament dies that I am hoping to use on a card/ornament design for the future.  

If you like this little guy leave a comment because I am considering designs for stamping and am trying to get a feel for which designs will be good as stamps.  It is quite expensive to develop a line of stamps and I am trying to get a feel for which designs the public will be interested in.  Fewer missteps that way.  


Sunday, November 20, 2011


Have you read the magazine Scrap & Stamp Arts by Scott Publications?  It is a great magazine for card makers, stampers, general crafters, and painters.  When I approached the magazine about my idea for an article they were very open to  incorporating painting techniques into their magazine.  I've been a subscriber for the past few years and love the magazine but wasn't sure if they had ever published articles using painting techniques specifically for card making but thought that I would give it a shot.  I discussed the idea of providing photos showing me painting the background papers as well as the design for the bees and the editor thought it was an interesting idea.  I am a very frugal artist and like to be able to control the background papers using media and materials that I have at home rather than running to the store to invest in more papers and came up with the idea to paint my own papers using a batik style of painting. You can also find the process on this blog under my archived articles.  It took a little time to get everything together for the article but it was well worth the effort as the article is fantastic and I hope it will be interesting to the readers of this magazine.  I have been considering developing a line of stamps from my designs but the costs can be staggering and decided to print out good quality line art printed on good quality card stock instead and have tried to keep the costs down so that card makers and crafters can afford them.  You can find these on my website under the Supplies Category in the main menu.

This article is designed for painters and crafters of all skill levels and I hope that you find it to be interesting and leaving you wanting more articles.  If you feel that way please contact the editor of the magazine so she continues to be interested in publishing painting designs.

Sunday, October 30, 2011

Watercolor Pencils

The instructions for painting this snowman and then making him into a darling card will be available in the December issue of the Tole Town Cyber Palette and in that issue I painted him using Deco Art Acrylic paints as well as have given you the instructions for using Copic Markers.  Prior to painting this little guy I wanted to experiment with color and chose to use my watercolor pencils. I will often use my watercolor pencils when I am working out color in the design process.  The watercolor pencils allow me to play with color before painting the finished version.

 I have a couple different brands of pencils that I use but used my Faber Castell Albrecht Durer pencils on this snowman.  I had just received them as a gift this spring and hadn't had a lot of time to play with them.  I love them but they are a little fatter than many of the pencil brands and I had to purchase a new electric pencil sharpener for them because they wouldn't fit in the old one.  If you are interested in watercolor pencils I would recommend this brand highly but be forewarned they are more expensive than other brands also obviously fatter.  I also have a set of Derwent and a small set of Prismacolor that I've used in the past.  Of the two I prefer the Derwent but both are about the same retail price. 

I hope that you take a look at this article when it is published in December.  http://toletown.com/ezine/ 

Sunday, October 2, 2011

New Patterns


I have a new pattern that will be available during NET in the Turns in Time booth as well is currently available on my website.  I recently sent this pattern off to Italy which means that I have become international.  Very Exciting!!!  This pattern is called the Chicken Coop and is a repeated design done on two candleholders from Turns in Time, one is designed to hold a tea light and the other a 2" votive or small candle like I've painted up.  They are marvelous to paint on and fairly flat so they would be so easy to store.  Let me know what you think about this pattern, your feedback is so important. 

Thursday, August 4, 2011

Watercolor

One of the reasons that I have not been posting as often this summer is because I have been taking a watercolor class.  I've been interested in refreshing my skills for a number of years now and finally was able to work it into my schedule.  I have to say that I love this class my teacher, Kendall Jan Jubb who is nationally known and recognized, has been just amazing and has allowed each one of us taking the class to go at our own pace and paint what we wanted to.  I've focused primarily on landscapes this year as I've really felt that was not one of my strengths.  The first class that I did was an all day watercolor on canvas class.  As we were instructed prior to class I went in with a couple ideas and we were told by the instructor that we were not going to draw with pencil on the canvas rather we were going to draw with yellow paint.  Well after I had a minor panic attack because I am usually a planner when I paint, I sketch, resketch, and may even lay it all out on the surface prior to painting.  When I had very privately hyperventilated I decided to suck it up and try something new and chose the aspen trees as they were a looser format and I felt that they might be something that I could truly learn from in the class.  I'm not sure that anyone in the class really knew exactly how terrified the thought of no control when I started to paint made me, I hope that I masked it very well.  At any rate I allowed myself the freedom to just experience the medium and the watercolor canvas and I loved every minute of it.  I chose to use color very freely and make the painting a very impressionistic loose painting.  As I have shown this piece to family members I get a mixed reaction, most of them say "Oh my".  I'm not sure if that is good or bad but I have chosen to think that they are just shocked at how completely different it is for me in style and format.  I love the piece and felt an incredible freedom when I was painting it because I felt removed form the confines of any "rules" of painting.  I'm curious to see what any of you think.  Now that you know that I love the piece I'm sure that you will all be kind.  LOL.  You can also say "Oh my".  I'm now working on my second landscape which I'm painting on watercolor paper and it too is different for me stylewise.  I can't tell you how much fun I'm having in this class and would highly recommend Kendall as a teacher if you ever have the chance to take one of her classes. 

Wednesday, August 3, 2011

New Patterns


I have finally gotten myself out of my painting room in the basement and can see the light of day.  LOL.  I must be super slow because it took me most of the summer to complete these new projects.  They are on my website and available for purchase just in time for HOOT.  Look for these patterns and many of my other patterns to be available at the Turns in Time booth at the HOOT show.  I have a number of new patterns as well as new products in the Supply Category and of course paint brushes as usual.  Come on over and take a look at all of them under What's New.  I'd love to hear from you about what you think of these.  I'm in the process of working on another pattern that will be out later this fall. 

Where has the summer gone?

As I was having coffee with some friends the other day, one friend mentioned that I haven't posted on my blog since the beginning of June and it is now the beginning of August.  It made me laugh because I can't quite figure out where the summer has gone to.  In my defense I have been so busy painting and designing and will have 5 new patterns available at HOOT and those seem to have consumed my time, as well as a new Tole Town Project that will be available in September that can be previewed on the front page of my website.  I'm planning to get a preview up on the blog of the new patterns very soon and should be able to get them on the website very soon as well.  I've also been taking a watercolor class that I have enjoyed tremendously and will share that with you as soon as we get the photo taken. 

We've also had quite a bit of company during the last few weeks which we have enjoyed thoroughly.  It is always fun to see family and friends.  We were up in the mountains last week and checked on the Huckleberry crop and they will soon be ready, I think that they need a couple more weeks to ripen and then we will get started picking to take us through the winter.  My son loves my Huckleberry Cake recipe which was given to me by a friend years ago.  In fact my son requested it as his birthday cake this year.  I'm posting the recipe here for those of you who love Huckleberries as much as we do.  I am not sure exactly how well you could substitute other berries but you certainly could experiement.

Huckleberry Crumble Cake
1/4 cp butter
1 1/4 cp sugar
cream the butter and sugar and add:
2 eggs
2 cp flour
1 t baking powder
3/4 cp milk
1 1/2 t almond extract
2 cp huckleberries
Mix in order and pour into greased 9X13" pan

Crumble Topping
1/2 cp sugar
1/2 cp flour
1/2 t cinnamon
1/4 cp butter
Mix until crumbly.  Sprinkle over batter in pan.  Bake at 350 for 45 minutes or until done.  Serve with ice cream or cool whip. 

This cake is similiar to a coffee cake and is wonderful at any time of the year.  I always check the cake at 40 minutes because it bakes quicker in my oven. 

Enjoy

Tuesday, June 28, 2011

End of June?

I can't believe it is the end of June already.  I have been keeping very busy painting and designing.  My most recent submission to Scrap and Stamp Magazine was accepted and will be in their January issue.  I was thrilled and hope that you will all be able to find the magazine to see the project.  They seemed very interested in promoting painted card designs to their readers.  I have a subscription to the magazine and really enjoy it and would recommend it to any of you who like to make cards.  They have very interesting technique articles in the magazine as well as cards made by very talented designers.    Hopefully the article will be well received and the editors will be interested in other projects as well.  The project that I submitted will be a technique project with painting that is appropriate for any beginner or non-painter. 

I also just found out that I will have an ornament project in the Paintwork's Ornament issue and was delighted about that.  I have been trying for a number of years to get a project in the ornament issue.  I'm not sure when that comes out on the newsstands but if my memory is correct it seems to me that it is in August some time. 

I have been working on a number of new patterns and hope to have a few of them ready for the HOOT show in August.  I'm planning to have some new bug designs painted on a plate and then sculpted and attached to a wood piece.  They are fun and I hope that you will enjoy painting them as much as I have enjoyed designing them.

Friday, June 10, 2011

Free Lesson Plans on the Web

Many of you have asked me recently where you can find good quality lesson plans to use with children.  The links that I am posting are kid-tested, teacher-approved and free for all of you to use.  Take a look and if you have any questions you can always feel free to contact me. 

http://www.decorativepainters.org/jac.php
http://www.dickblick.com/lesson-plans/
http://www.dynasty-brush.com/dynastybrush_christy_hartman.htm
http://www.triarcoarts.com/lesson-plans.html

http://store.schoolspecialtyonline.net/OA_HTML/xxssi_ibeDefaultCenter.jsp?type=IBE&name=SAX_LESSONPLANS#allgrades

Saturday, May 7, 2011

As many of you know I am a wildflower fan.  This Shooting Star was completed using the FM Dynasty Trifecta Brushes and was painted on a leather coaster using the Deco Art So Soft Paints.  This scan doesn't really do the flower justice because the colors are actually more intense on the original but will give you the idea as to how to paint this project.  The instructions for this project can be found on my website on the free pattern section.  There is no line art for this piece as it is strokework flower that I painted freehand.  Yes, you can also paint this, place a clear sheet of plastic over the photo and practice using the brush until you achieve the look of the flower.  I'm doing this as a make and take during SDP Nationals in Wichita on Friday May 20th and if you are attending stop by and see me sometime during the day but if you aren't attending I have an amazing show special on the brushes on my website that will last until after I return from Wichita and you can also paint this flower.  You can see another version of this Shooting Star below that I painted on cardstock using Deco Art Americana paints. 

I'm also teaching a class for anyone interested in providing quality educational projects to kids of all ages on Saturday May 21 in Wichita.  I'm teaching with an amazing group of talented women and between all of us have too many years of teaching experience to even tally.  LOL.  Check us out on the SDP Website for the Fun and Joy of Art Education. 

Friday, April 15, 2011

Penny Black Stamp

Isn't this stamp adorable from Penny Black Slapstick Stamps.  I recently visited my sister and her family and stamped this to send as a thank you card to her and colored it with my Copic Markers.  This was my first try at this stamp and later did a second one to send to her as there were a few things that I wanted to change.  I didn't stamp this with Momento Inks and I should have because I found that the Versamark stamp pad smeared a bit.  I knew that it might because I've been doing some research about which stamp pads seem to work best.  When I did the second one I didn't make that mistake.  I had just ordered this stamp and had hoped that it would be as cute as it was on the website and wasn't disappointed.  On our way home from visiting my sister and her family we stopped in Spokane Art Supply in Spokane, Washington and purchased a few more Copic Markers to add to my growing collection but as I told my husband I need a few more before I really feel that I have all the colors that I want.  There are so many uses for them.

I'm using the Copics when I work up a color worksheet of my designs and find that the Copic colors are very close to my paint colors, it certainly makes it easier when I change Copic colors on paper rather than repainting something.  A great design tool. 

Tuesday, March 22, 2011

Another Background

How about using tissue paper to form an interesting textured background for your cards, collages, or scrapbooking pages.  I adhered the tissue with Deco Art's Dura Clear Gloss Varnish by brushing the varnish over the paper, ripped pieces of white and yellow tissue paper and placed it on the cardstock brushing over the top with additional varnish and continued until I had covered the paper.  While the paper was still wet sprayed the same transparent Deco Art paint colors over the tissue paper that I used in the previous post.   It was quick and easy to do and is fairly interesting.  I'm planning to try something slightly different within the next few days.  I'm not sure exactly what I will do with this but think that it will make a great background for a card.  I need to play with it a bit more to find my favorite combination of materials and paint application.  It is pretty bold and the gloss in the varnish didn't scan as well as I had hoped but we'll see what happens when I try something slightly different. 

Any ideas for how to use it????

Thursday, March 17, 2011

Background Papers

Do you like to do a variety of paper crafts? Many of us like to use premade background papers. What if you could use the materials that you currently have and make your own? I decided to try my hand at making my own background papers. I wanted these to have a soft subtle appearance similar to what an airbrush would achieve however I didn’t own an airbrush. After some trial and error I found that small travel sized spray bottles worked really well and were certainly more economical. I found that the Deco Art transparent colors worked very well; Americana Bright Yellow, Viridian Green, and Primary Blue gave me a nice mix. I then added Glamour Dust Paint to the papers to give them that soft shimmer.


• To mix the paints I added a small puddle of paint to the bottom of each spray bottle and began adding water, testing on a separate piece of paper until I was happy with the resulting paint color.

• Next I wet a 12”X12” piece of white cardstock with clean water that I had beside me in a spray bottle.

• Next I sprayed Bright Yellow onto the wet piece of cardstock. It may be necessary to spray clean water over your yellow paint to get it to move around on the paper.

• I layered Viridian Green over the Bright Yellow, again spraying the mix with clean water to encourage the paint to mix and blend naturally. You will find that some puddles appear depending on the amount of water that you have used, move your cardstock around to encourage the paint to mix and blend always allowing each previous color to show.

• Layer Primary Blue over the green and yellow layers. Apply as much or as little as you prefer. If you find that too many puddles are still on the paper you can gently absorb some of the paint with a paper towel. Dry with a hairdryer.

• Paint Glamour Dust Lemon Drop randomly over the yellow areas, Glamour Dust Limelight over the green, and Glamour Dust Sapphire Blue over the blue areas.

• Allow these to dry completely and iron out the wrinkles making sure to protect your iron with a soft cloth.


Are you interested in using other paint colors, look for the transparent Deco Art Paint colors and experiment with making your own color combinations. These make beautiful background papers for cards, stamping, and altered art. If you are interested in seeing other paint combinations and other techniques visit my website and blog.


Sunday, February 27, 2011

Trifecta Brush Designs

In an earlier post I had promised that when the Paintworks online project came out I would let you all know and it finally came out online at http://www.paintworksmag.com/projects/index.shtml and the project photographed beautifully.  I know that the editors chose to have this photograph be a Christmas themed project which is an interesting take on it but you can see that it wasn't designed with a holiday theme.  This photo is mine not the photo from the article and this isn't as good but you can see the project easily.  I used the Trifecta Brushes to paint the Plumeria and the Hibiscus flowers on the candles. 

I'm also posting another photo of a sunflower that I painted using the Trifecta Brush and painted the petals of the flower by pulling the brush on the side of the bristles but double loaded the brush to shade and highlight at the same time.   I used the smallest brush in the set to add the shaded detail on the center of each petal.  The center of the flower is painted using a stipple brush and I carry that 1/4" Deerfoot Brush on my website as well.  The Dynasty Deerfoot brush is quite possibly the best on the market and is an excellent price for the quality.  Why not pick up the set of Trifecta Brushes and throw in a few extra brushes to round out your order. 

Monday, February 14, 2011

Simulated Airbrush Background Papers for Cardmaking and Scrapbooking

Have you received your Deco Art Newsletter?  I am featured under the Helping Hands section showing how I have painted background papers that I've used in card making and scrapbook pages then added a splash of glitter using the Glamour Dust Glitter Paints.  It was fun to do and I'm thrilled that Deco Art liked the process and was interested in adding it to their newsletter.  This is a very fun way to use what you have at home to paint papers and is very inexpensive.  I used travel sized spray bottles and a very limited palette to paint cardstock.  The photo that I am sharing with you today simulates the look of batik and all I used were flowers that I had cut out of vellum on the Cricut and layered my paint to form this lovely paper.  How fun is that?  My next post will show another background paper but with a slightly different palette and technique.  Don't receive the Deco Art Newsletter?  Go to http://www.decoart.com/ to sign up today.  You won't be disappointed. 

Sunday, February 13, 2011

FM Dynasty Trifecta Brush

What an amazing brush!!!  I can't tell you how much I love this brush.  I originally received a prototype set when Dynasty was developing this new brush and I immediately fell in love, in fact I was after the folks at FM Dynasty to hurry up and get it released to the public because I wanted to be able to share it with all of you.  The learning curve with this brush was not steep at all and I found myself using it in so many different applications, this is going to be one of those brushes that I use on a regular basis similar to my love affair with the Wave Filbert.  It was originally designed as a triple load strokework brush, hence the name Trifecta, however I'm not a strokework artist and I love this brush.  Now that I am free to sing its praises I am going to have to share with all of you some of the different uses for the brush.  Watch for those in the coming weeks. 

You can purchase the brush on my website and as far as I know I am one of the first sites to carry it.  I have a great deal going right now on the set with free shipping.  Come on over and take a look and be one of the first to purchase this amazing brush. 

Don't confuse this brush with Loew Cornell's Miracle Wedge, while it appears to be similiar the bristles on the brush are not cut quite as deep and it is much easier to use.  I purchased the Miracle Wedge because I wanted to compare the two and I wasn't thrilled with the Loew Cornell version.  I felt that the Miracle Wedge was harder to use and you didn't get the full impact of the brush because the bristles are cut deeper.  Take a look at my soon to be released free download project on the Paintworks site, hopefully it will be available soon, to see how I used the set of brushes to paint tropical flowers. 

Monday, February 7, 2011

Background Papers

I've been playing around with a number of different background papers when I can't find the exact colors that I want for my cards.   This is one example and then I stamped over the top of it randomly with a variety of stamps.  I'm sure that it will show up in a design somewhere, I just haven't figured out where.  I think that it is fun and certainly shows off the stamped design even if it is a little jumbled, however that is exactly what I was going for as I'm planning to cut sections out of it.  I'll keep you posted on what I do with it. 

Wednesday, February 2, 2011

Copic Markers

Have any of you used Copic Markers?  I received a set for a Christmas gift and I have to say I am hooked.  I've been working with them and love how easy they are to blend.  I haven't felt that there was much of a learning curve  but have just really spent some time familiarizing myself with the them.  I think that they are so much like painting that my thought process with them isn't that different.  I just recently completed some of the leaves similiar to the Jewel Tone Leaves that I have been painting and will post them soon.  Keep an eye out for my next post. 

Finished Card

Here is the finished product.  You can access the free project on my website.

Friday, January 21, 2011

Honeysuckle Leaf Third Installment

If you will notice the red areas on these leaves are beginning to darken,  I've added Metallic Festive Red between each vein.  This is the last shading that I will do to this and will next add a highlight and then will reveal the finished card.

Monday, January 17, 2011

Honeysuckle Leaf #2

I've added Alizarin Crimson to the red areas to add definition and deepen the shaded area.  I'm using a #2 round to paint this entire leaf.  Wash your paint into each veined area and layer each of these paint colors using more of a glazing technique.  I hope that you can see the additonal paint colors that I've added. 

Saturday, January 15, 2011

Prepping for Valentines Day

I started thinking about Valentines Day and of course spring especially when you consider that we haven't had a day without snow since Thanksgiving.  I thought that I'd start a new project that just might make a fun Valentines Card as well as put a dash of spice into our drab winter weather.  I've been busy painting leaves for a new pattern that should be out sometime soon and thought that a step by step leaf project might be a valuable resource for anyone interested in this new pattern as well as a sneak peak.  I chose to use the new hot color of the season according to Pantone which is called Honeysuckle except I used Electric Pink as the base and washed Peony Pink into the shaded areas of  the leaf. 

Do you like this project?   Paint along with me and we'll both have a finished card by the end of the process.  I'll post the next step soon. 

Monday, January 3, 2011

Creativity and House Elves

I'm posting a link to a talk by Elizabeth Gilbert that is fascinating.  http://www.ted.com/talks/lang/eng/elizabeth_gilbert_on_genius.html  For those of you who aren't familiar with her she wrote the book Eat, Pray Love and talks about the worry that many of us face that we may have already peaked in our artistic lives and may not have another creative thought that is worth sharing with the world.  She also delves into the idea of "Where Creativity Comes From"?  I have certainly been asked on many an occasion where did my inspiration come from and rarely do I have an answer, sometimes in the shower.  LOL.  Sometimes in the middle of the night and can be fleeting and if I don't write the idea down immediately can be gone forever.  That is certainly frustrating.   Elizabeth thinks that we have little elves similar to the house elves in Harry Potter who are responsible for our creativity and if something fails then it it their fault.  That is a fairly simplified version of her conversation but a part that appealed to me.  So if a pattern or a project fails to sell well it may not be my fault and instead is my creativity elves fault.  That certainly takes the pressure off of me to be "creative" all the time.  LOL.  I thought that her talk was entertaining and wonderfully insightful and can see why she is on the best seller list as well as having Julia Roberts portray her.  It could certainly bring about an interesting discussion.  I don't see Julia Roberts jumping up to portray my creative life.  I wonder why not?  LOL. 

Tuesday, December 21, 2010

Another Great Santa

Look at this tin Santa that was painted by Connie Bartch.  This is her beautifully painted rendition of the First Star of Christmas pattern that I have been demonstrating during the past month. She was nice enough to allow me to post her painted project and I hope that you will enjoy her lovely work and leave nice comments for her.   Thanks again Connie. 

Wednesday, December 15, 2010

Santa Card

This cute guy was painted by Bev Atkins and she was kind enough to allow me to share him with all of you.  Isn't he fantastic!  I cheated and used my Cricut to make my letters and candy cane but Bev painted hers on and used a lovely green background.  I love it.  Thank you so much for sharing him with me and for letting me post him on the blog. 

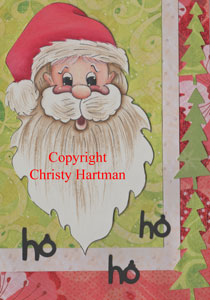
Completed Santa


Whew!  I wouldn't have thought that this project would have taken quite this amount of time because it was an easy process.  It was an easy project but as we all know life gets in the way, but I finished this project up last night and can post the finished copy.  I used scrapbook papers for the background and used my Cricut Cartridge Christmas Cheer to cut out the lettering and trees.  I love putting projects together, it always seems like such a great way to finish up something that you've been working on and such satisfaction in the completed project.  Obviously you can completely paint the background if you prefer, use a variety to materials to decorate the cards such as sequins, brads, or found objects.  How about instead of using scrapbook papers using wrapping paper instead?  If you do something with this Santa face I would love to see the finished project, in spite of the length of time that it took me to complete it was very quick and easy.  I actually did four of these cards but am only posting the two that I liked the best.  This guy would look lovely done with either watercolor pencils, or even regular colored pencils. 

I'm not sure what the next series of blog posts will be about but check back often to see what I do in the New Year.

Sunday, December 5, 2010

Santa Face 2nd in the Series

I know that this has taken me all week to post the second in the series.  Believe me it has been a busy week.  But here is the second in the series and as I was painting Santa's face to post today it occurred to me that I hadn't posted the line art so you could paint right along with me.  Here it is!  I will post additional instructions as I paint.  Remember these painting instructions are only suggestions, you should feel free to change the colors to suit your style and mood.  Remember that you are painting on white paper so you won't need to base the areas that will remain white. 

Instructions for painting Santa's Face: 
1.  Base the face with Deco Art Americana Hi-Lite Flesh, float shade with Shading Flesh, highlight with Light Buttermilk.  Base the pupil of the eye with Lamp Black, dip dot with Snow White and float a light highlight float onto the eye.  Float the cheek with Spice Pink and deepen the float over the mustache with Antique Maroon. Base the inside of the mouth with Antique Maroon.  Dip dot the cheek with Snow White. 
2.  Base the hat with Santa Red, float shade with Napa Red, highlight with Light Buttermilk. 
3.  Using a rake brush thin Asphaltum down and wash it into the beard and hat trim areas and then float shade Asphaltum under the hat brim, around the face and under the mustache.
4.  Using a SL line the hair on Santa's forehead with Snow White. 

If you are painting along with me I'd love to see the result.

Monday, November 29, 2010

What Else Can I Do With this Santa Pattern? Santa Card Step by Step

In my last post I mentioned that I was planning to do a step by step demonstration using one of the Santa faces from the First Star Of Christmas Pattern.  I used the face from the tin santa and changed the hat slightly and painting this on 140lb hot pressed watercolor paper.  I've painted only the face adding the shading and highlighting and painted in the base color of the hat.  The next step will be to add the shading and highlighting to the hat as well as beginning the process of developing the beard, mustache, hair, and hat trim.  Check back soon to see this project develop into a Christmas Card for family and friends.

Sunday, November 28, 2010

What Else Can I Do With this Santa Pattern?

I hope that you all had a lovely Thanksgiving.  I know that I did, we had a very nice day although we ate too much.  LOL.  I'm sure that you didn't have that problem.  "Grin, grin."  We spent the day with family and friends and it was a terrific day eating a wonderful meal and awesome company.  After we had cleaned up the Thanksgiving dinner dishes my thoughts turned to Christmas shopping and we began planning our shopping day on Friday.  I had actually done some shopping prior to Black Friday so I was in good shape but still needed to pick up some specific items.  Honestly I am not a Black Friday shopper at unbelievable times in the morning, the thought of being out that early in the morning just horrifies me, however I did go to town later in the day and did some shopping and then finished up the remainder of it on Saturday.  I have a few more items to purchase prior to Christmas but am in really good shape.   What a great feeling!

My thoughts are now on getting ready to decorate for Christmas, the tree needs to be put up and the house transformed.  I started thinking about my patterns and thought which patterns could be adapted, I have numerous Christmas patterns that could easily be adapted to different surfaces but this Santa pattern appears to be the most difficult because of looking like it is so surface specific.  With a little creativity you could definitely adapt this to different surfaces and with my next few posts look for me to offer you ideas how to adapt one of these Santa's to be used on a card.  It can be done with just a few minor changes.  I'm going to do a simple step by step project that you can use to make your own Christmas cards and who knows I may even use the Cricut to add some interesting detail. 

Take a look at this project and think about the other options for surfaces for it.  As I stated above cards are an obvious choice but what about candlesticks.  Why not use this pattern to make beautiful candlesticks for your holiday table?  How about putting one of the Santa faces on the center of a plate to serve cookies or homemade goodies on and give the plate and goodies to your friends as a gift.  There are numerous great small wooden or tin plates that can be used that are relatively inexpensive and anyone would be delighted to receive a wonderful gift like that.  How about using one of those fantastic battery operated candles to adapt the pattern to.  I think that one of the round candles would be a fantastic small chunky Santa. 

Anyone out there have any other ideas?  Look for my next post starting the step by step Santa adapted to a card. 

Tuesday, November 23, 2010

What Else Can I Do With This Love Bug Boogie Pattern?

As I write this we are in the midst of one of the worst snow storms that we've had at this time of year for a long time, it is hard to think about spring being right around the corner when it is Thanksgiving.  LOL. We have a long winter ahead of us if this initial blast is any indication.  It seems ironic that I would choose to write about Spring when we have blizzard and driving condition warnings, but somehow it seems oddly appropriate.  I must be a glutton for punishment when I know that I am going to have a terrible drive to work in the morning.  LOL. 

That being the case, what might possibly be some ideas for other uses for this pattern since I am obviously wishing for nice weather?  Lets think about the obvious ones to start with, cards always come to mind and you can view the free pattern that I did as a companion to this pattern on this blog the "Night Light Bug".  Since completing that free project I've purchased a Cricut Die Cut Machine and could certainly use many of the different cartridges to add to and enhance this design.  You could add borders, change the painted lettering to one  using the Cricut fonts, and enhance the background.  How about finding an interesting poem to use on the inside of the card, print it out on your computer, use a great scrapbooking paper as a background thus personalizing the card for someone special.  Of course you could do the same thing for any of the bugs that are on this pattern and make an interesting card design to showcase the individual bugs either on the clips or on the candle holder design.  How about making a long thin card where the bugs flow down the front of the card similiar to the clips on the pattern.  Keeping that theme going why not cut out tags on the Cricut and paint the bugs onto the tags and add them to your Christmas packages?  Wouldn't your friends and family think that was fun and just a little quirky???  Imagine the fun they will have when they open their packages Christmas morning?

If you look carefully at the candleholder design you will see that it tells a story of a bug's night out dancing in the moonlight. Why not use that idea to paint a series of paintings as a storyboard on watercolor paper or cardstock, mount them either individually or as a series using matte board and an interesting frame.  This would be darling in a child's room or as a seasonal accent in your home.   Years ago when I first became interested in decorative painting it was all the rage to cut out individual pieces and hang them on your walls as plaques. Wouldn't these bugs look darling cut out as individual pieces to hang as accent pieces for the storyboard idea that I mentioned above?  Here's another thought paint the bugs onto the edges of the picture matte board to enhance the storyboard!  That would continue the design on out to the outer edges of the piece.  Some of my favorite pictures that I've hung in my home are those where the painting incorporates the matte extending the painted surface. 

Have you been listening to the news media and the concern over the body scans that airport security is using?  I'm not going to expound on the whole issue of body privacy in this blog but it certainly made me start thinking about my travel concerns for 2011 and one is certainly how to recognize my luggage.  Why not paint a luggage tag with bugs on it to help identify your luggage? 

How about painting a fun pin to wear with one or more bugs on it?  I love to wear pins especially my vintage pins that are family heirlooms.  As a teacher my students look at my jewelry  and comment on it and a bug pin would be a fun addition to my spring clothing wardrobe.  Ok, now I know that I've gone over the deep end if I am thinking about wearing cooler clothing when I decided to take a space heater with me in the morning because my classroom was so chilly yesterday.  I'll leave you with those ideas to mull over while we weather through the remainder of winter and think thoughts of snowmen and winter driving.  Like me it will give you something to think about instead of cold winter weather and concerns about driving, shoveling snow, and cold weather.  Have a wonderful winter season while you dream of nice weather to come.

Monday, November 22, 2010

Important change to the website!

I have made some changes to the Pattern Categories on my website that you will need to know to purchase your favorite patterns.  If the pattern is only available as an E-Pattern it is still under the E-Pattern Category.   However if the pattern is also available as a Paper Pattern Packet, that you will receive through the mail, the patterns are organized according to the pattern theme in the Menu.  To find the patterns that are available as both E-Patterns and Pattern Packets you will need to look through each pattern category.  I have placed a drop down menu to purchase either pattern type under the pattern description.  Simply click on either the Paper Pattern or E-Pattern and the red cart button and the pattern will be added to your shopping cart with the accurate price. I hope that this makes your shopping experience simple. 

Saturday, November 13, 2010

What Else Can I Do With this Wildflower Pattern?

This is one of my very favorite patterns, I spent a great deal of time developing my techniques to paint this piece.  I have to say that hours went into using a variety of brushes in a variety of ways to try to come up with something that looked very much like the original wildflowers.  Needless to say I've done a careful study of these wildflowers to try to be as scientifically acurate as possible.  These are two of my favorite wildflowers, the Lupine and the Scarlet Paintbrush and they are fairly prolific during the summer months. They can even last into August if we have a decent amount of moisture.  Not only do we see these in the mountains but they are also found in the prairie regions of the US from Montana all the way down into Texas. 

I began to wonder what else could I do with this project to make it more versatile, which we all know that painters and crafters are so good at doing.  My daughter, who loves hiking and camping in the back country, wanted a photo album painted with wild flowers for her birthday.  I used the flowers in this piece as the border and painted a young lady with her backpack holding a map as the centerpiece.  It was truly lovely and unfortunately didn't have a chance to get a photo of it prior to giving it to her.  I just used a larger sized album that I purchased from Creative Memories, I think that it was 12"X15", and this size gave me a nice sized canvas area to paint on.  Now my daughter can save all of her backpacking memories in this album. 

I also thought that maybe it would be nice to have summer even in the cold winter months and painted these flowers on glass ornaments to give for Christmas gifts.  I personally love nontraditional ornaments on my tree and thought that these were a great idea.  I sat down one afternoon and within 2 hours had painted 2 dozen ornaments.  I've also painted these on my old standby of cards that I've given to friends on their birthdays. 

So often we look at a design and are put off by it because we don't own the brush that the artist used to paint it.  I used two of the Dynasty Butterfly brushes to paint these but have found that you can easily substitute the Dagger brush to paint the Scarlet Paintbrush with outstanding results and a small flat brush to paint the Lupine.  I've painted both of these flowers with a variety of brushes and had a great deal of success in fact I used a 1/8" Lettering brush to paint the Lupine recently and loved the result.

When I was demonstrating this project at the Hoot Show in Ohio this year I had a number of ladies mention that "of course I could do these wildflowers I designed them" which made me laugh because they are truly so simple to do if you follow my instructions and look at the color worksheet which I am posting for your information here. 

Let me know your thoughts on this project?  Does it scare you off because you feel it is too scary or do you feel comfortable giving it a try? 

Friday, November 12, 2010

What Else Can I do with this Tooth Fairy Pillow Pattern?

How many of you paint or craft with children in mind? I know that I certainly do. I painted for my children when they were small and painted gifts for nieces, nephews, and eventually my children's friends. I have a number of projects that were designed specifically for children and one of my favorites is the pattern "Even Monster's love the Tooth Fairy". I think that it is darling as a tooth fairy pillow but can't you just picture it as a card or a wood cutout for some adorable child.

This project was inspired by one of my own children's favorite books Where the Wild Things Are by Maurice Sendak. I can't tell you how many times I've ready that book over the years and it remains one of my favorites to read aloud even now. In fact I just read it last month to my kindergarten classes. Both I and children alike love a good monster story and if you've been a follower you know that this is a project that I've done over the years with some of my students.

As I was thinking about what else could be done with this pattern I immediately thought about cards, but why not think in terms of enlarging the monsters faces, cut them out of 1/2" pieces of pine and hanging them in a nursery or a toddler's room. How about painting them on a larger pillow or in the center of a quilt for a lovely bedding set? How about on a glass block to use as a child's nightlight?

I think that the possibilities are endless and would love to hear your ideas. I hope that many of you will take the plunge and share your ideas.

Sunday, November 7, 2010

What Else Can I do with that Pattern? Second in the series.

With the economy the way that it is I don't know about all of you but I certainly want to be able to find creative ways to use the things that I already have. I think that the word that I am looking for is repurposing. Not a particularly good post when I am in the business of selling new patterns. In spite of that thought thriftiness is exactly what prompted this set of blog posts. I've been taking a look at many of the patterns that I've designed and thought what else could my customers do with that pattern that would be fun and creative. Cards are one thing that comes readily to mind. Don't we all love to get handmade cards in the mail. I know that for me handmade cards are the ones that touch my heart and tend to get saved and pinned up onto my bulletin board or hung up on that popular repostitory of all things important in my life, the refrigerator. If I can't find something that I "thought" that I had filed I look up on the refrigerator. LOL. Often I find it there. Sad but true.

I like to send cards to friends when they are having a rough week for one reason or another and find that a cute card brightens up their day. I've recently had a number of friends and family who have fought a battle with cancer and later each one of them reminded me of how much it brightened a rough patch when they received a card in the mail. A handmade card that I had made for a friend in a similiar situation brought her to tears, not exactly my plan, but it certainly showed me how much any handmade item touches the hearts of those we love.

Keeping that in mind I took a look at the patterns on my website and thought which ones might be fun to redesign into cards. Since I've been thinking about friends who have been having challenges in their lives I immediately thought of the pattern "Hear no Evil, See no Evil, Speak no Evil" under the Miscellaneous Pattern Category. Since friends have been on my mind I thought what a perfect pattern to develop as a card because it already shows three friends out on a night on the town having a great time. A little bread, a little cheese, some yummy wine and good friends, what more could we want? There would be minimal work to adapt it to a card surface painted on watercolor paper and layered over a lovely scrapbooking paper would be fantastic.

How about ideas from all of you?

Sunday, October 31, 2010

What Else can I do with this Project?


How many times have you purchased a pattern or a book and painted every project on a different surface than the artist did? Probably a lot would be the answer, we as painters and crafters are a terribly creative group otherwise we wouldn't be interested in this hobby. In this economy we have to be very frugal and if we are going to purchase a pattern or a book we want to make sure that we get the most out of our money. I'm no different, as I complete any project I often like to come up with another use for the project for myself and for all of you who purchase my patterns. If you look at the pattern "Falling Leaves" under the Fall Pattern Sub-Category you will see that for the money you get three different projects that you can complete: 3 Fall Cards, the Fall Lazy Susan, and the battery operated Ornament Candleholders. The cards would be lovely to take in conjunction with a bottle of wine as a hostess gift, the ornaments can either be placed on a tree for the fall/winter holidays or can be used as battery operated candleholders, and the lazy susan could be switched out with charger plates or candle plates. How about instead of plates you use the pattern to design a table cloth or a table runner. I think that these leaves would be gorgeous painted around the edge of a table cloth and used for Thanksgiving dinner with a beautiful centerpiece. I love fall and love the look of fall leaves but keeping them intact is often a challenge why not paint them and enjoy the look without the dust that so many of us are allergic to.

Often when I design a project I like to come up with an alternative to the surface that I've used and in the next few blog posts I'll use my creativity to come up with new surface ideas for my patterns. Post your ideas as well and lets see if we can get a running dialogue going.

Saturday, October 30, 2010

Loss of Painting Magazines

It has been a sad day in the painting industry to hear of yet again another painting magazine being eliminated. I was in the process of developing two new projects that the editor and I were discussing, this morning I received an email answering an inquiry that I had sent concerning one project and then this evening finding out that the company had chosen to eliminate this magazine as well as their other craft magazines. After receiving this email that I know many of you also received I could hear the sadness and shock that the editor must have felt. I know that this was probably an economy based decision but it makes me feel so sad for the jobs that were lost due to this decision as well as the loss for the artists/designers that developed such lovely designs for the industry.

We as painters need to band together to keep the industry alive and we can do that by communicating with each other on the painting forums, frequenting the blogs that we enjoy, and communicating with the editors and owners of the magazine companies not only our complaints about the magazine issues but also what we like and appreciate about the job that they are doing. I know many of you already interact with online painting groups, I personally belong to a number of them and post as often as my schedule allows.

I've heard talk that online magazines may be the wave of the future with subscribers downloading their magazines to home computers or personal devices. Currently I receive an educational magazine in a digital copy and must say that I miss the smell and feel of holding the magazine in my hands. To keep this from happening we need to speak up and help the industry by being proactive to keep an artform that we love alive.

On the front page of my website I've suggested that you leave comments and interact with the blogs that you enjoy, I know that I would like to have that type of feedback to provide my customers with the best quality service that I can.

Friday, October 29, 2010

JB Weld Kwik Wood Ornament Pattern Available

I finally finished the ornament patterns and have them available on my website, all four pattern photos are currently on the website. You can purchase the patterns as E-Patterns to make as Christmas gifts for friends or for your craft shows. Kwik Wood is so easy to use and made quick work of the sculpting process. I owned a set of sculpting tools because I have been interested in sculpting for some time now but if you do not have the tools there is no need to invest in a set as you can use household items and even can make a few of your own. I give you sculpting instructions, illustration templates, hints and tips for making your own sculpting tools or household items to use in each of the patterns as well as numerous photos for reference. I purchased my first tube of Kwik Wood at Home Depot but later found it at a local hardware store. If you like these patterns please leave comments so I can get the feedback on this set for future reference.

Saturday, October 9, 2010

JB Weld Kwik Wood Ornaments


My last post mentioned that I was using JB Weld Kwik Wood to sculpt with, adding it to wooden shapes to develop something new and different. I really love the process as well as the product. It paints up beautifully and even though you have a fairly small window to work with it is relatively easy to use. Here is one example of an ornament that I made using it. This pattern is soon to be released on my website for purchase. I hope that you like this.

Tuesday, September 21, 2010

Kwik Wood

Have you tried working with JB Weld Kwik Wood. I've been working on ornaments with it that I am sculpting and then attaching to some wooden ornaments by Cupboard Distributing. I'm planning to have the pattern ready to go prior to the Christmas painting season. It is amazing and so versatile. It is an epoxy putty that you knead with your fingers prior to using then just sculpt away and you literally just set it on the wood piece and it adheres within seconds. It eliminates the need for any type of adhesive. I've finished two so far and am working on three more for this set and then have plans for four more to add to the set. I can't wait to share these as they are soooo much fun to do. Hopefully I will be able to get them finished up and on my website soon. I'll keep you posted.

Monday, September 13, 2010

30 % Off Stock Up Brush Sale

All the paint brushes on my website www.chartmandesigns.com are currently on sale for 30% off the retail prices. Are you someone who likes to start Christmas shopping early? I am and I know that I love a good sale. What could be better for that special painter in your life than a brush and pattern combination.