Tin
Tooled Poinsettia
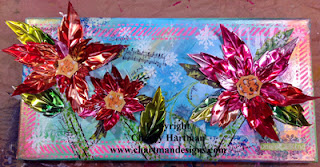
This canvas is a follow up to previous tin tooling projects that I have shared with you and will allow you to use those techniques that you’ve been practicing but will encourage you to incorporate tin on a canvas surface. This is meant to be a loose project where you can be very creative and use the media in a slightly different way. This project will take a few posts to share the entire project with you, stay tuned.
Supplies:
Tin of your choice, I used 36 gauge aluminum.
Stylus, tracing paper, scissors
Canvas size of your choice, I used a 6”X12”
Assorted scrap booking papers.
Alcohol ink colors of your choice
Assorted acrylic paint colors to be used on the canvas
Stencils
Rubons
Deco Art Decou-page
Hot Glue
I love mixing media and am thrilled
with how creative you can be by using different media on a variety of different
surfaces. This project mixes tin,
canvas, scrapbooking papers, and I even added Washi Tape to the stems. I opted
to tin tool poinsettias that are added to a canvas that I painted and added a
variety of fun stencils. This canvas will be beautiful
during the holiday season or would be a lovely gift for a friend. In my opinion it is never too early to start
thinking about Christmas gift giving.
Choose any paint colors that you prefer, I used shades of blue, greens, and metallic gold that I blended together onto the canvas using a slip slap triple loaded brush technique and my fingers. Use paint colors that work with your décor and eventual plans for this project. I had just purchased a set of Dyan Reaveley’s Dylusions Stencils and chose to use them on this canvas with various shades of pink and white. This type of painted background is very subtle and is meant to showcase whatever is placed in the foreground. I then added Washi Tape onto the canvas for interest.
I also added green Washi Tape onto
the canvas to form the stems that you can see in the image at the beginning of
the instructions, I like to decoupage Washi Tape onto the canvas to make sure
that it doesn’t come off. I also cut out
a variety of leaves out of scrapbooking papers and decoupage them onto the canvas;
you can use the attached line art as your leaf shapes as well as your flower
petals. I also had rubons that I added
to the canvas as an interesting detail as well as adding veins on the leaves
and some random written phrases using a permanent black marker. If you are
going to use Rubons it is important to add a coat of decoupage over them so
they stay put. I love rubons and love
how creative they look on a canvas. This
is your canvas and should be completed using materials that you have at home
and are fond of.


No comments:
Post a Comment